Paylaş
- Pardus kurulumda alternatif disk bölümleme araçları – Bölüm 2 – Cfdisk
- Pardus kurulumda alternatif disk bölümleme araçları – Bölüm 1 – Fdisk
Giriş
Bu yazımızda Pardus Btrfs Kurulum yazısının 1. bölümünde bahsedilen disk bölümleme araçlarından cfdisk ile nasıl disk bölümleme yapılacağı anlatılacaktır.
Hazırlık
Pardus Çalışan ile canlı ortamda tarif edilecek bu işlemler için pardus yüklü önyüklenebilir usb bellek ile bilgisayar başlatılır.
Uyarı !
cfdisk ve fdisk gibi disk yönetim araçlarını kullanmadan önce olası veri kayıplarının önüne geçmeniz için diskteki varsa önemli verilerinizi yedeklemeniz gerekmektedir.
Hatırlatma
Pardus btrfs kurulum yazısına ithafen düzenlenen bu yazıda btrfs disk yapısı ile disk bölümlendirme yapılacak. Ancak diğer dosya sistemleri için de (örn. ext4) bölümlendirme yapılabilir.
Hatırlatma
Pardus iso kalıp dosyasında btrfs-progs paketi ön yüklü olarak gelmiyor. btrfs sistem inşa etmek istiyorsak bu paketi çalışacağımız sistemde aktif etmeliyiz. Benzer şekilde başka bir dosya sistemi örneğin zfs inşa etmek istiyorsak zfsutils-linux paketinin, xfs sistemi için ise xfsprogs paketinin yüklenmesi gerekir.
Uçbirim açarak aşağıdaki kodlarla işe başlıyoruz.
sudo su -
apt update
apt install btrfs-progs
Cfdisk
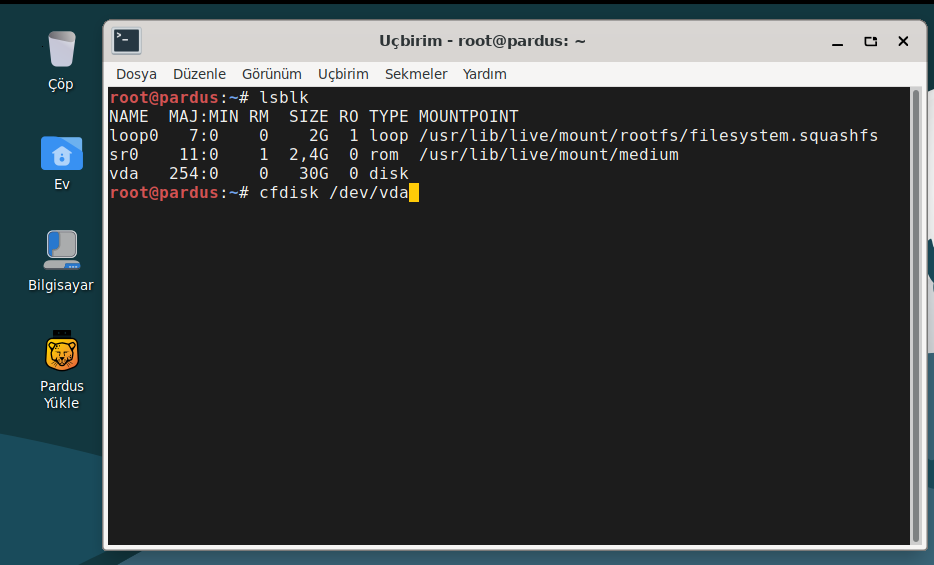
Mevcut duruma bir göz atalım ve ardından bölümleme yapmak istediğimiz disk için cfdisk komutunu yazalım.
cfdisk /dev/vda
Hatırlatma
Sistemimizde disk ismi vda olarak listleniyor. Sizde sda ya da nvme0n1 olarak listelenebilir. Komutu ona göre düzenleyin.
cfdisk
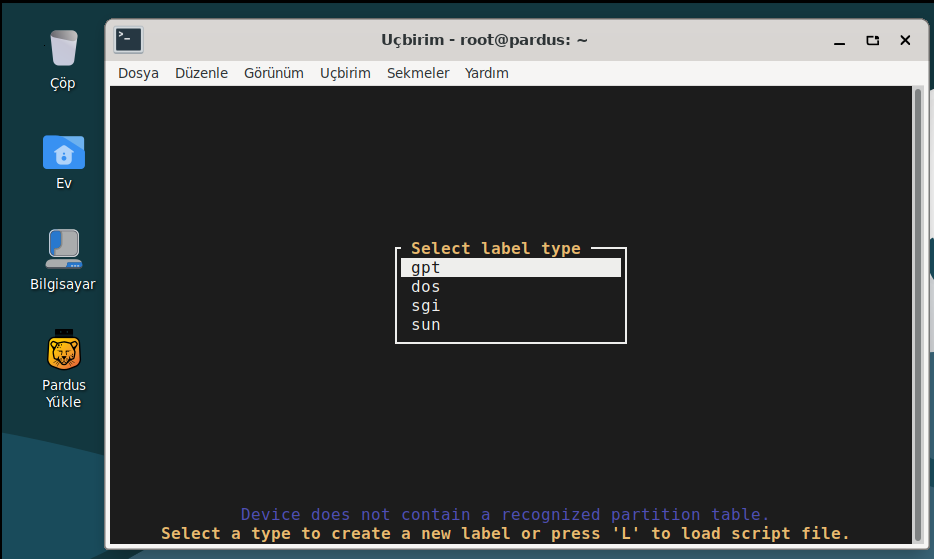
GPT disk yapısı seçerek devam edeceğiz.
cfdisk
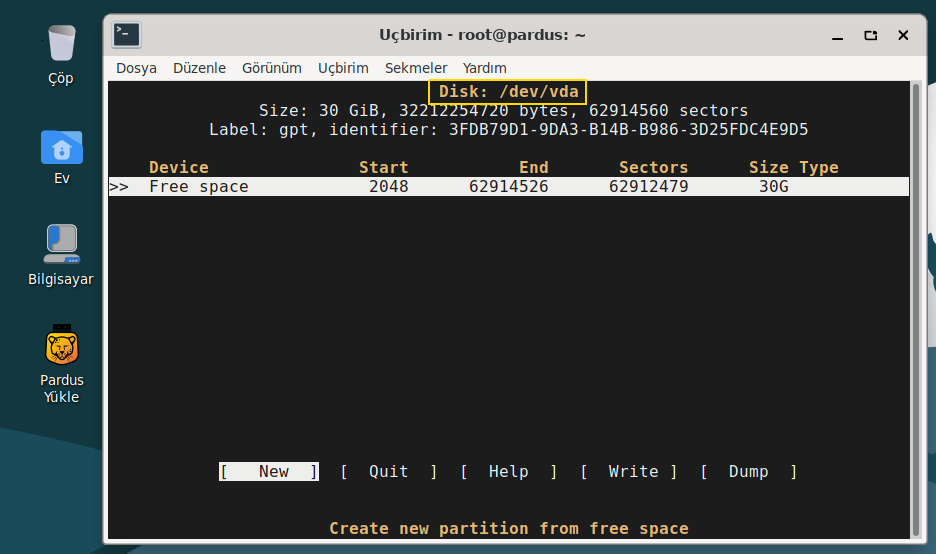
Disk isim, boyut gibi bilgilerin yukarıda, işlem menülerinin aşağı konumlandırıldığı bu pencerede klavye yukarı-aşağı yön tuşları disk bölüm seçimlerini, sağ-sol yön tuşları ise yapılmak istenen işlemi gerçekleştiriyor. New komutunu seçili hale getirip enter ile devam ediyoruz.
cfdisk
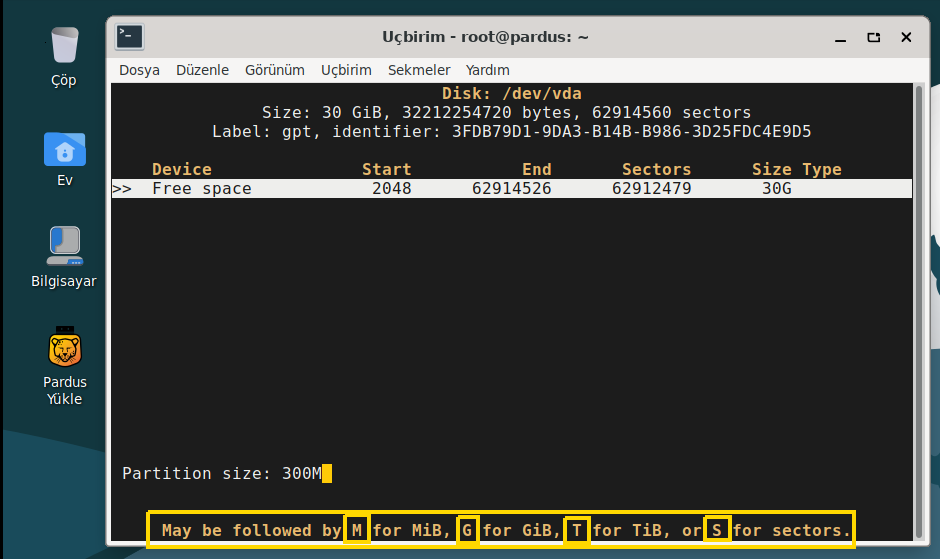
Efi bölümünü oluşturmak istiyoruz. Boyut ayarlamak için rakamı ve Megabyte teriminin baş harfini birleşik yazarak kullanıyoruz.
cfdisk
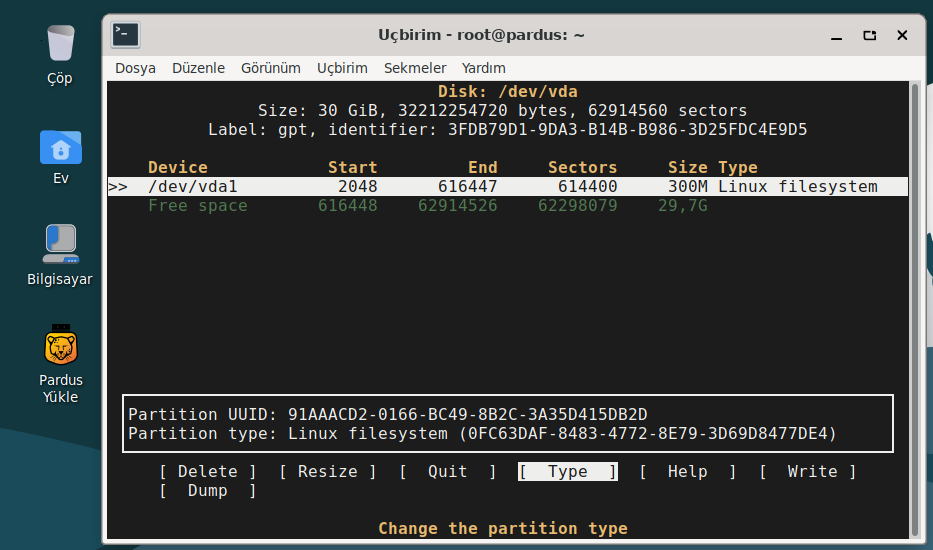
Boyutlandırma ile birlikte bölüm türü otomatik olarak Linux filesystem olarak belirlendi. Bunu ihtiyaca göre değiştireceğiz.
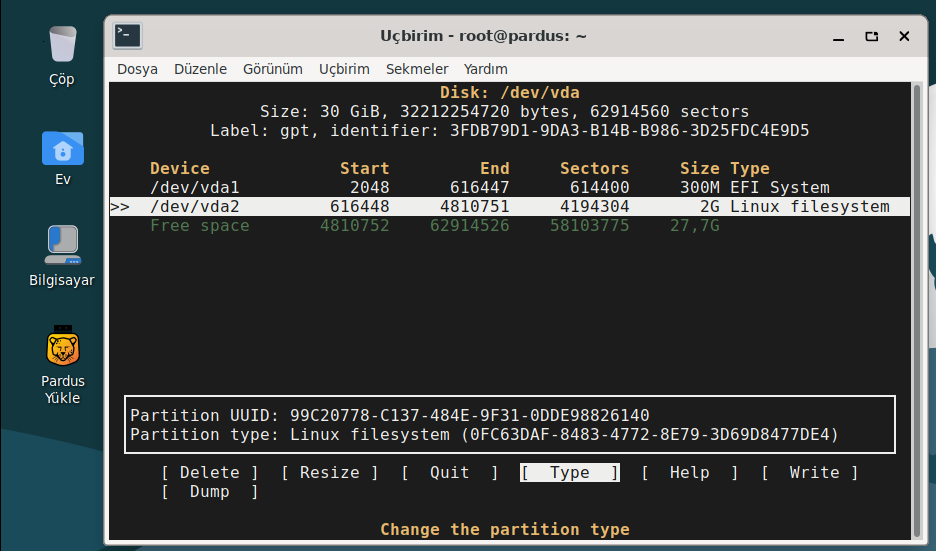
Bölüm türünü belirlemek için Type komutu ile devam ediyoruz.
cfdisk
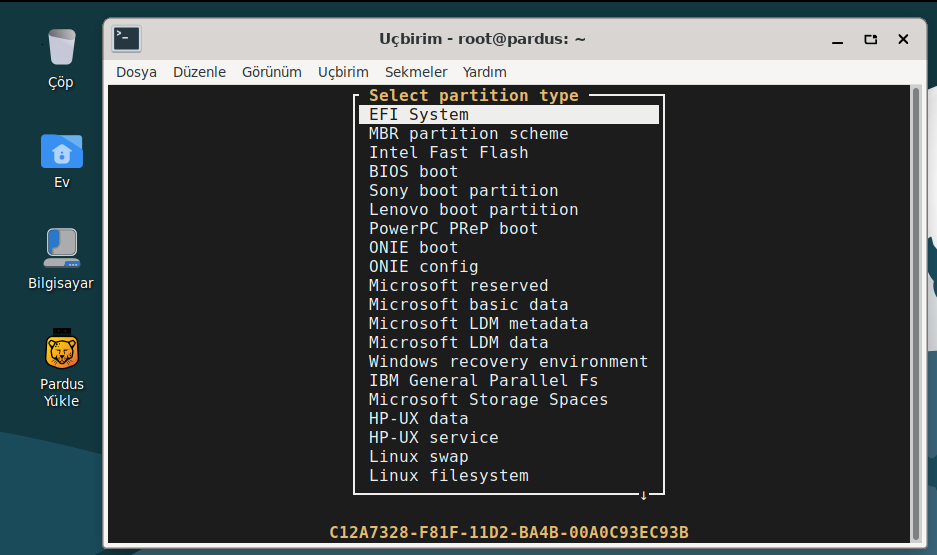
EFI System işaretleyerek devam ediyoruz.
cfdisk
İsteğe bağlı swap alanı oluşturmak için boş alan seçili haldeyken tekrar New komutu ile devam ediyoruz ve yine Megabyte, Gigabyte cinsinden boyut belirliyoruz.

cfdisk
Swap alanı için Type komutu ile devam ediyoruz.
cfdisk
Linux swap türünü işaretleyerek devam ediyoruz.

cfdisk
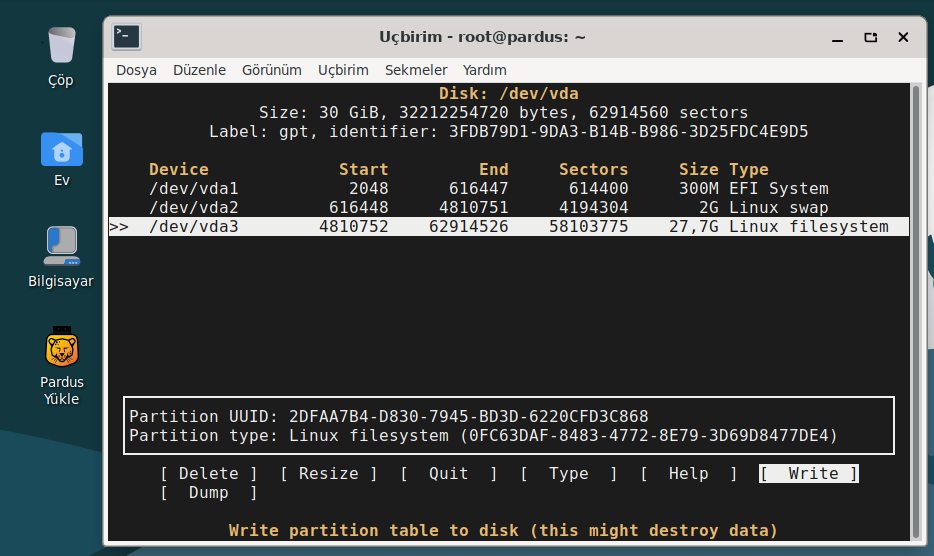
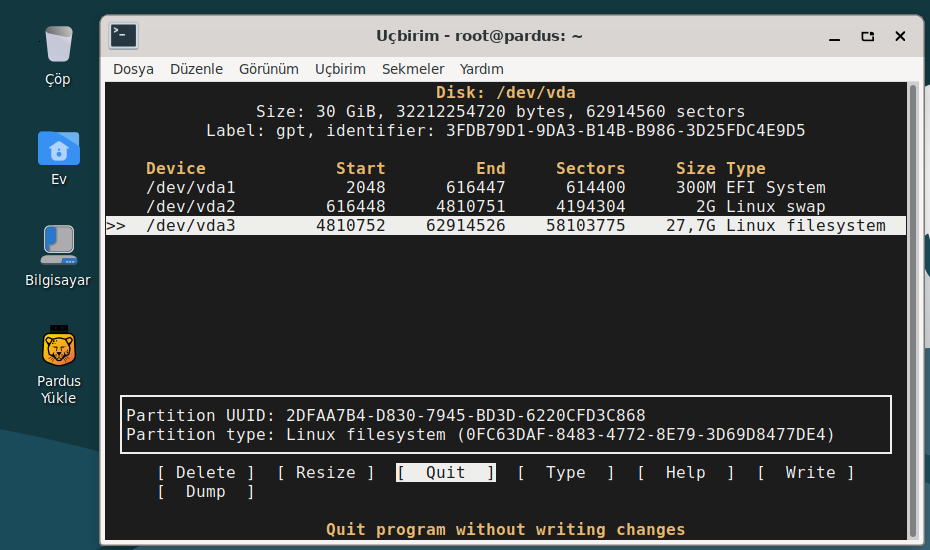
Tekrar boş alan seçiliyken New komutu ile devam edip kalan bölümün tümünü sistem bölümü olarak belirliyoruz. Type kısmını otomatik olarak Linux filesystem olarak atadı. Yapılan işlemleri diske yazmak için Write komutu seçiliyken enter tuşu ile devam ediyoruz.
cfdisk
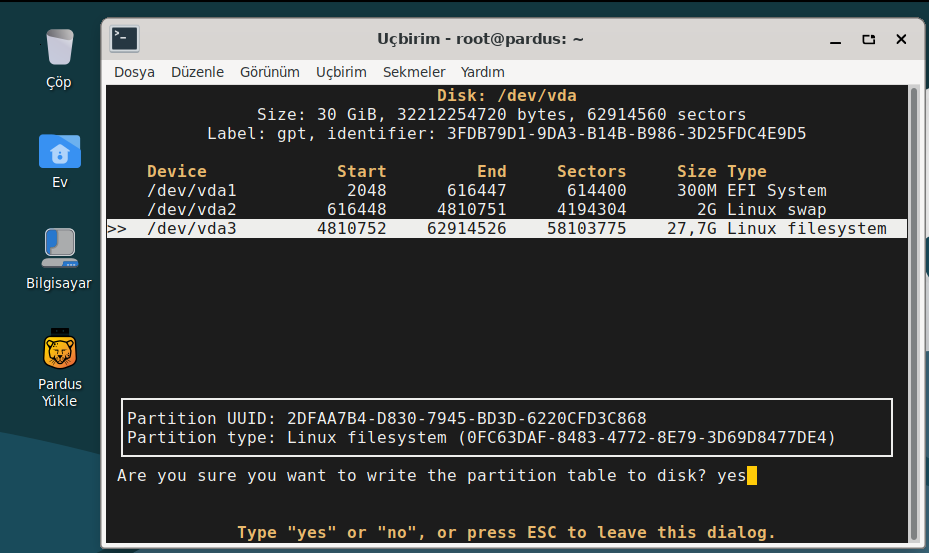
Yapılandırma işlemini onaylamamız isteniyor. yes yazıp enter tuşuna basarak devam ediyoruz.
cfdisk
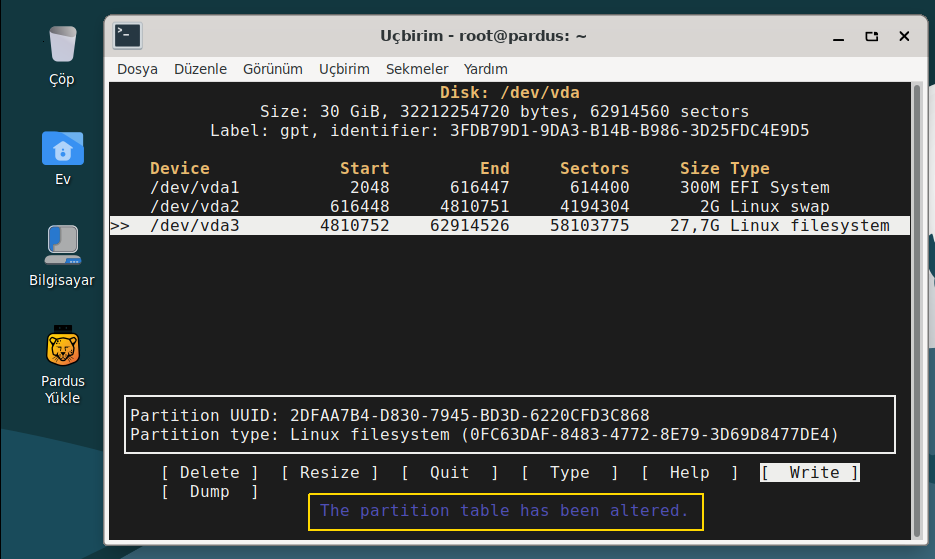
İşlemin tamamlandığı mesajı görüntüleniyor.
cfdisk
Quit komutu ile uygulamadan çıkış yapılır.
Şimdi boyut ve tür bilgilerini belirlediğimiz bölümleri biçimlendirmeye geçelim. Bunun için aşağıdaki kodlarla devam edeceğiz.
mkfs.vfat -F 32 /dev/vda1
mkswap /dev/vda2
mkfs.btrfs /dev/vda3
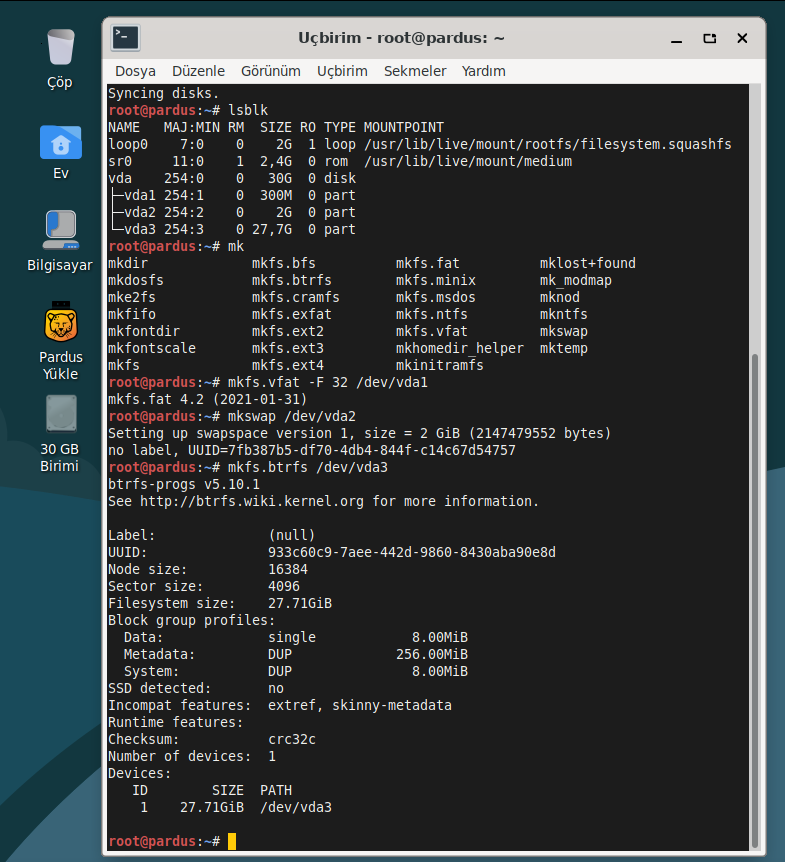
Biçimlendirme işleminden sonraki diskin durumu görüntülemek için şu kodu kullanabiliriz.
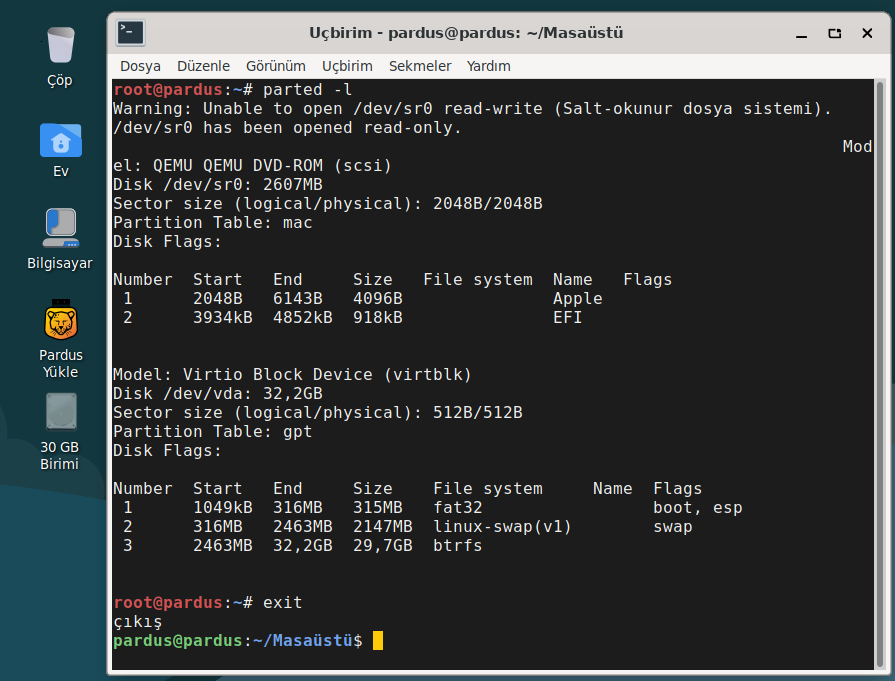
Disk bölümleme işlemi tamamlandı.
Faydalı olması dileğiyle , başka yazılarda görüşmek üzere…

Benzer Yazılar
İlginizi Çekebilir
ETAP’ta Pencereleri Yönetmenin En İyi Yolu: gTile ile Verimliliğinizi Artırın!
Uygulama Tanıtım
19 Şub '25Pardus Güncel Nvidia Sürücü Kurulumu
Nasıl?
26 Ara '24Bir git tabanlı projede yazma iznine sahip olmak isteyen Hackerlar(Yazılımcılar) için Kılavuz
Nasıl?
15 Şub '24Az bilinen nano özellikleri
Nasıl?
9 Şub '24