Paylaş
- Pardus kurulumda alternatif disk bölümleme araçları – Bölüm 2 – Cfdisk
- Pardus kurulumda alternatif disk bölümleme araçları – Bölüm 1 – Fdisk
Giriş
Bu yazımızda Pardus Btrfs Kurulum yazısının 1. bölümünde bahsedilen disk bölümleme araçlarından fdisk ile nasıl disk bölümleme yapılacağı anlatılacaktır.
Hazırlık
Pardus Çalışan ile canlı ortamda tarif edilecek bu işlemler için pardus yüklü önyüklenebilir usb bellek ile bilgisayar başlatılır.
Uyarı !
fdisk ve cfdisk gibi disk yönetim araçlarını dikkatli kullanmanız olası veri kayıplarının önüne geçmeniz için önemlidir. Varsa diskteki önemli verilerinizi yedekleyin.
Hatırlatma
Pardus btrfs kurulum yazısına ithafen düzenlenen bu yazıda btrfs disk yapısı ile disk bölümlendirme yapılacak. Ancak diğer dosya sistemleri için de (örn. ext4) bölümlendirme yapılabilir.
Hatırlatma
Pardus iso kalıp dosyasında btrfs-progs paketi ön yüklü olarak gelmiyor. btrfs sistem inşa etmek istiyorsak bu paketi çalışacağımız sistemde aktif etmeliyiz. Benzer şekilde başka bir dosya sistemi örneğin zfs inşa etmek istiyorsak zfsutils-linux paketinin, xfs sistemi için ise xfsprogs paketinin yüklenmesi gerekir.
Uçbirim açarak aşağıdaki kodlarla başlayalım.
sudo su -
apt update
apt install btrfs-progs
Fdisk
Mevcut duruma bir göz atalım ve ardından bölümleme yapmak istediğimiz disk için fdisk komutunu yazalım.
fdisk /dev/vda
Hatırlatma
Sistemimizde disk ismi vda olarak listleniyor. Sizde sda ya da nvme0n1 olarak listelenebilir. Komutu ona göre düzenleyin.
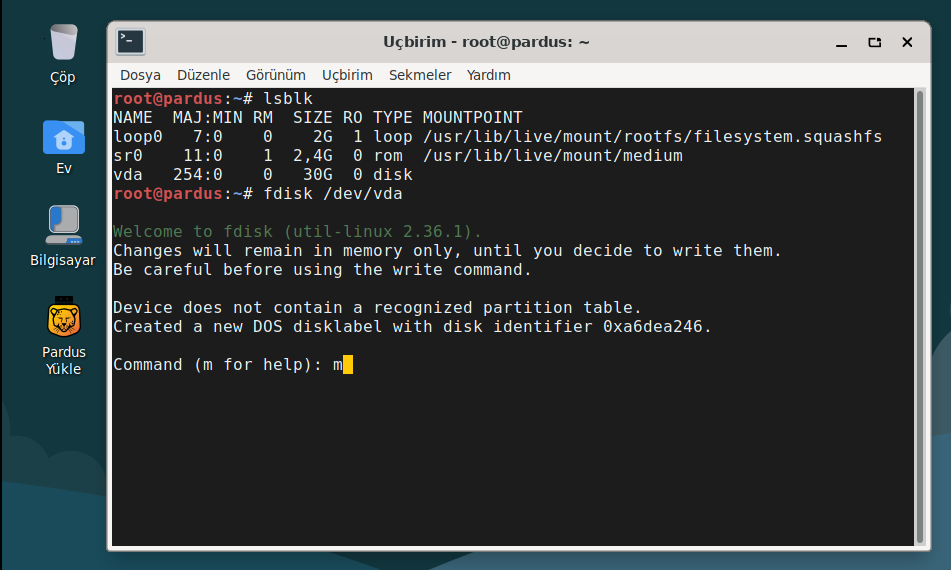
fdisk
fdisk komutuna geçildikten sonra harf + enter yöntemi ile ilerler.
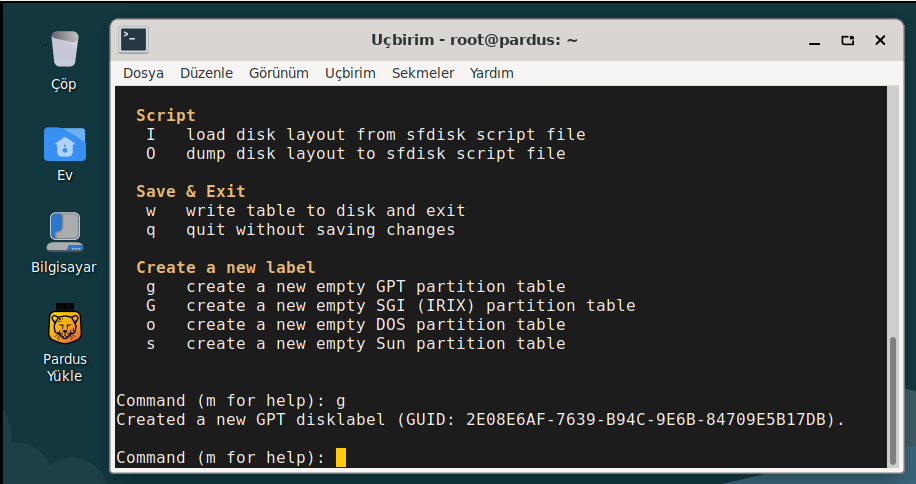
m harfi kullanabileceğiz komutları listeler.
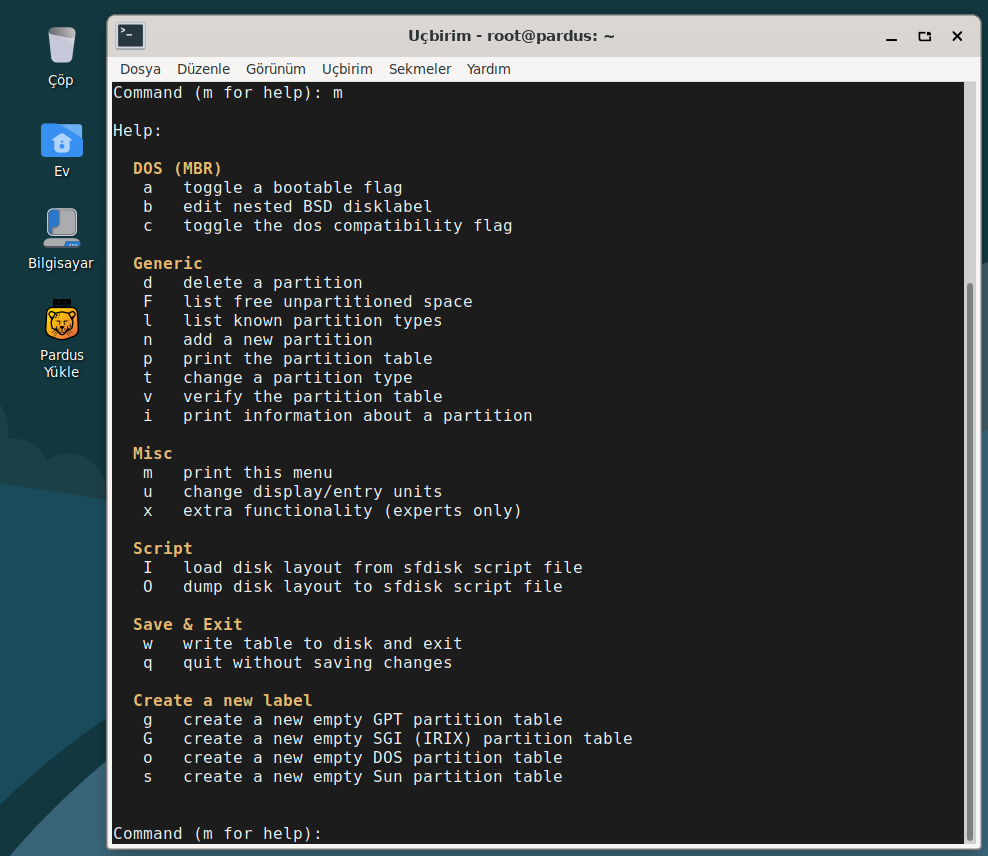
fdisk
g harfi ile GPT yapısında yeni birim oluşturulur.
fdisk
n harfi ile yeni bir bölüm oluşturulur. p harfi ile primary (birincil) bölüm olacağı belirlenir. Boyut için megabyte, gigabyte simgeleri olan M, G harfleri + işareti ile birlikte kullanılır.

fdisk
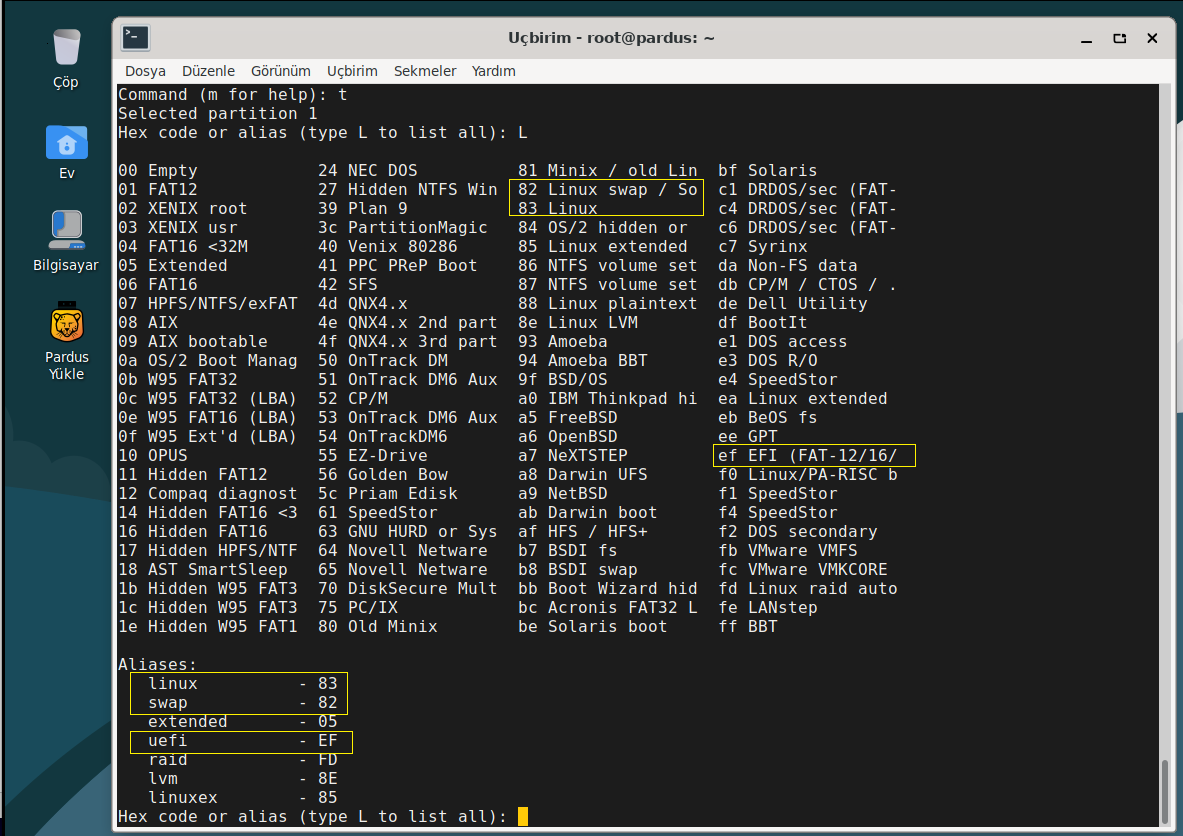
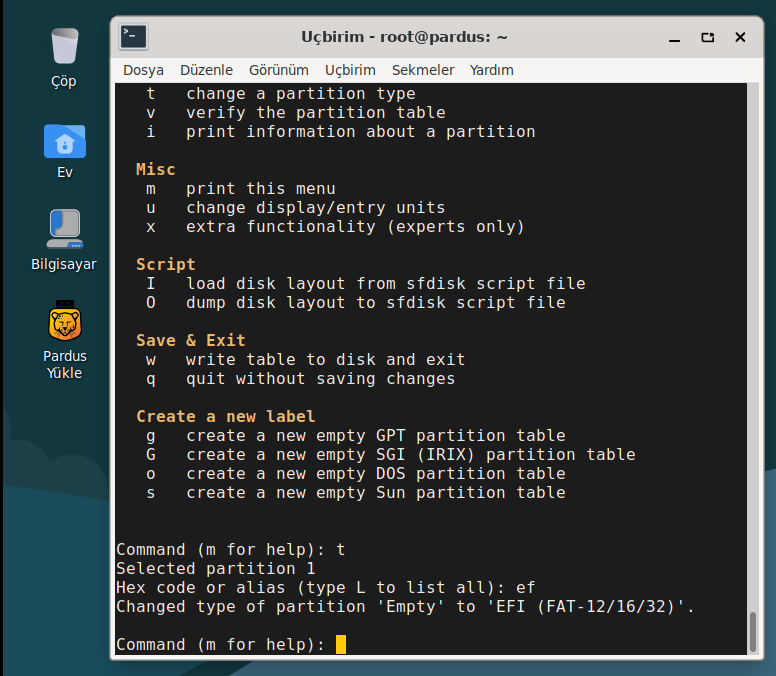
t harfi ile bölüm dosya sistemi tipi belirlenir. L harfi kullanabilir dosya tiplerini listeler. Bölümü efi bölümü olarak belirlemek istiyoruz ve ef kodunu kullanacağız.
fdisk
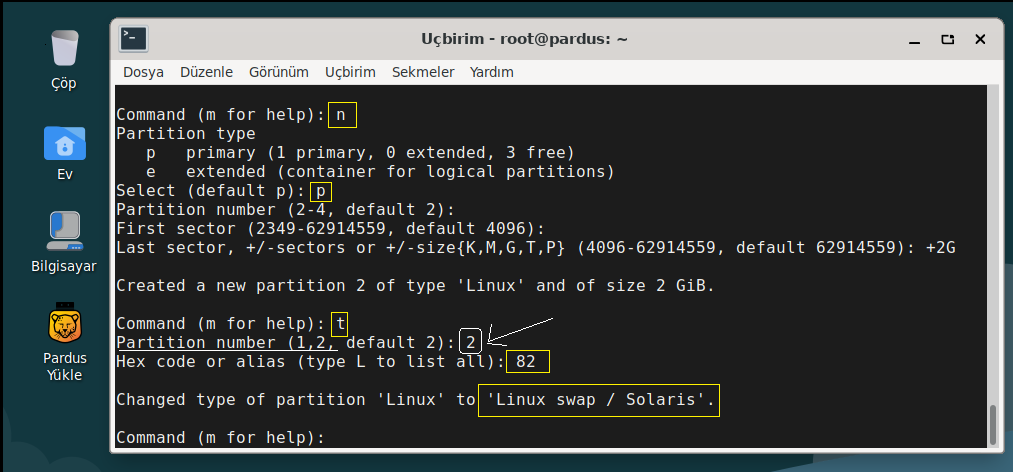
tekrar n harfi ardından p harfi ile yeni birincil bölüm oluşturulur. Bu bölüm isteğe bağlı swap alanı olabilir.
Dikkat
Birden fazla bölüm oluştururken bölüm türünü belirlemek istediğinizde , numaralandırmaya dikkat edin. Örnekte swap alanını ikinci bölüm olarak oluşturduk ve t parametresi ile işlem yapmak istediğimizde bölüm numarası seçmemiz istendi. 2 numaralı bölüm ile devam ettik. Swap kodu 82
fdisk
Son olarak sistemin kurulacağı bölümü oluşturmak için yine n harfi ve ardından p harfi ile devam edip diskin kalan bütün bölümünü bu alan için ayarladık. t harfi ile de tür olarak Linux seçimi yaptık. Linux kodu 83
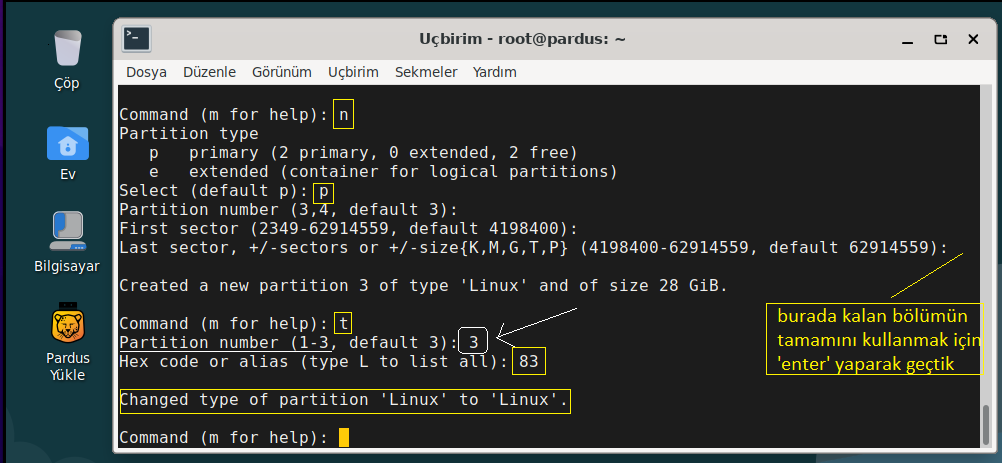
fdisk
w harfi ile belirlediğimiz işlemlerin diske yazılması sağlanır. Bu işlemin bitmesiyle fdisk komutundan çıkılmış olur.
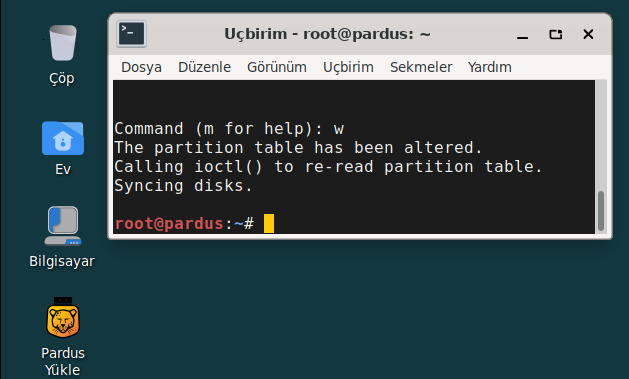
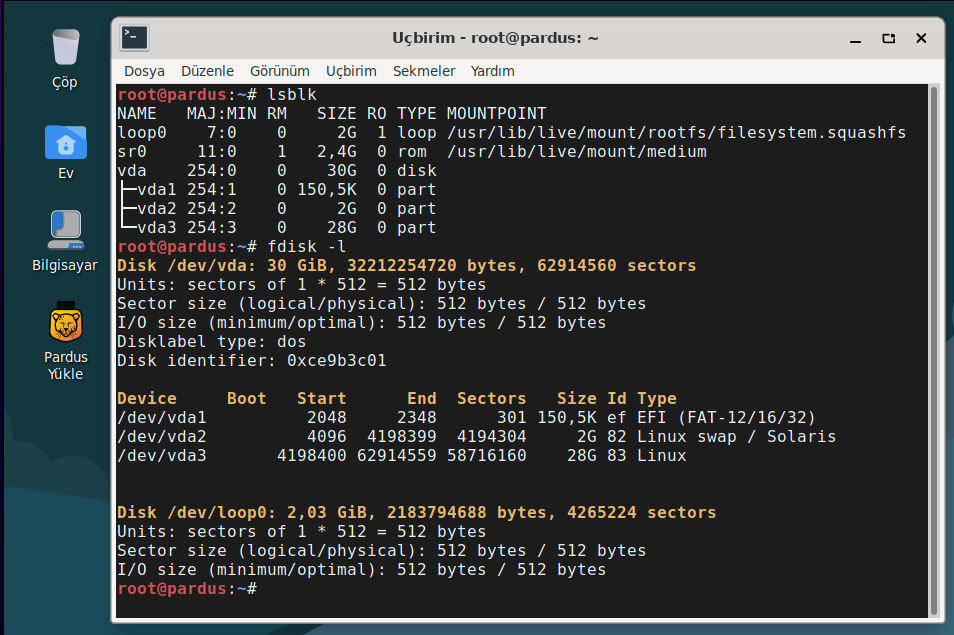
Diskin durumuna bir göz atalım.
fdisk -l
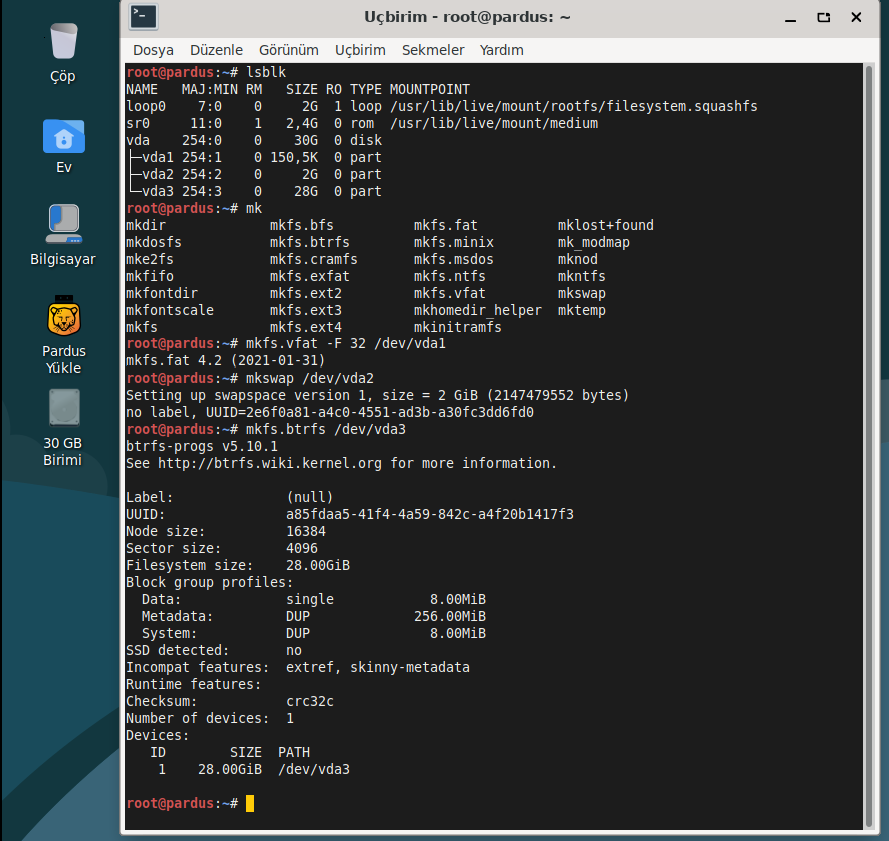
Şimdi boyut ve tür bilgilerini belirlediğimiz bölümleri biçimlendirmeye geçelim. Bunun için aşağıdaki kodlarla devam edeceğiz.
mkfs.vfat -F 32 /dev/vda1
mkswap /dev/vda2
mkfs.btrfs /dev/vda3
Biçimlendirme işleminden sonraki diskin durumu görüntülemek için şu kodu kullanabiliriz.
parted -l
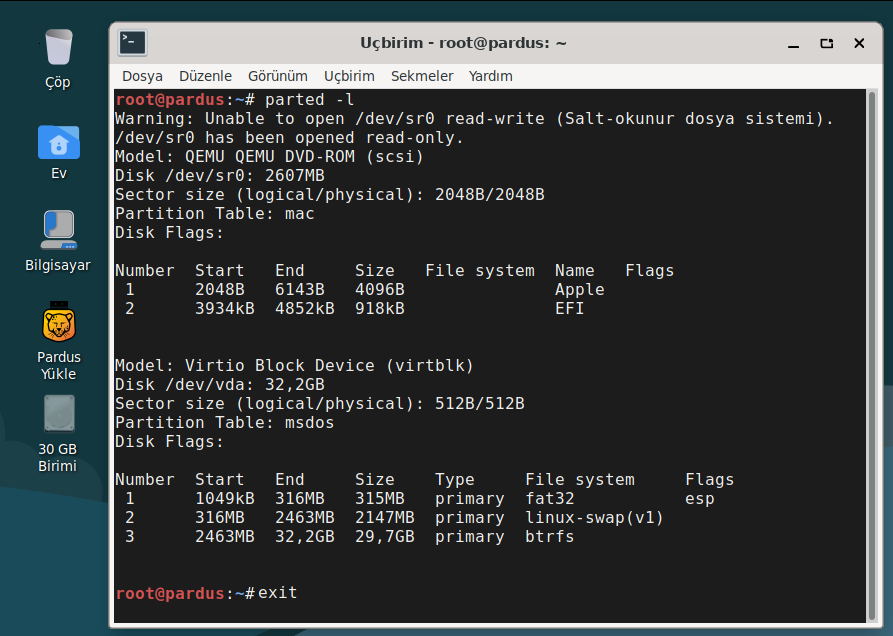
Disk bölümleme işlemi tamamlandı.
Faydalı olması dileğiyle , başka yazılarda görüşmek üzere…

Benzer Yazılar
İlginizi Çekebilir
ETAP’ta Pencereleri Yönetmenin En İyi Yolu: gTile ile Verimliliğinizi Artırın!
Nasıl?
19 Şub '25Pardus Güncel Nvidia Sürücü Kurulumu
Nasıl?
26 Ara '24Bir git tabanlı projede yazma iznine sahip olmak isteyen Hackerlar(Yazılımcılar) için Kılavuz
Nasıl?
15 Şub '24Az bilinen nano özellikleri
Nasıl?
9 Şub '24