4 dk okuma süresi
31 Oca '23
Paylaş
Bu yazımızda sizlere Pardus’a katkı sağlamak istiyorsanız bunu nasıl yapmanız gerekiyor bunlardan bahsedeceğiz ve ufak bir örnek vererek açıklayacağız. Bunun için ilk olarak GitHub’taki Fork ve Pull Request mantığından bahsetmemiz gerekir. Git ile ilgili önceki yazımızı okumamışsanız eğer buradan okuyabilirsiniz.
Fork Nedir?
İlk olarak Fork nedir bunu açıklayarak ilerleyelim. Fork, katkı yapmak istediğiniz projenin birebir kopyasını sizin GitHub adresinize (hesabınıza) dahil etmeye yarar. Yapacağınız tüm geliştirmeleri bu Fork repo üzerinde yaparsınız, yani asıl repo üzerinde değişiklik yapmazsınız.
Pull Request Nedir?
Pull Request ise bir projenin koduna eklemek veya değiştirmek istediğiniz değişiklikleri diğer proje katılımcılarına sunmak için kullanılan bir yöntemdir. Pull Request ile yaptığınız değişiklikler, projenin sahibi veya diğer katılımcılar tarafından incelenir, yorumlar yapılır ve uygun görüldüğü takdirde projenin koduna dahil edilir.
Bunları nasıl kullanacağız?
Öncelikle Pardus’un kaynak kodlarının olduğu yere, github.com/pardus adresine gidelim. İlk kez Pull Request’i deneyimlemek isteyenler için oluşturduğumuz, pardus-was-here projesini seçelim. Seçtiğimiz bu projede siz de aşağıda uygulayacağımız adımları tekrarlayarak katkı sağlayabilirsiniz.
Projede yapacağımız değişiklikleri gerçekleştirmek için aşağıdaki adımları tek tek göreceğiz:
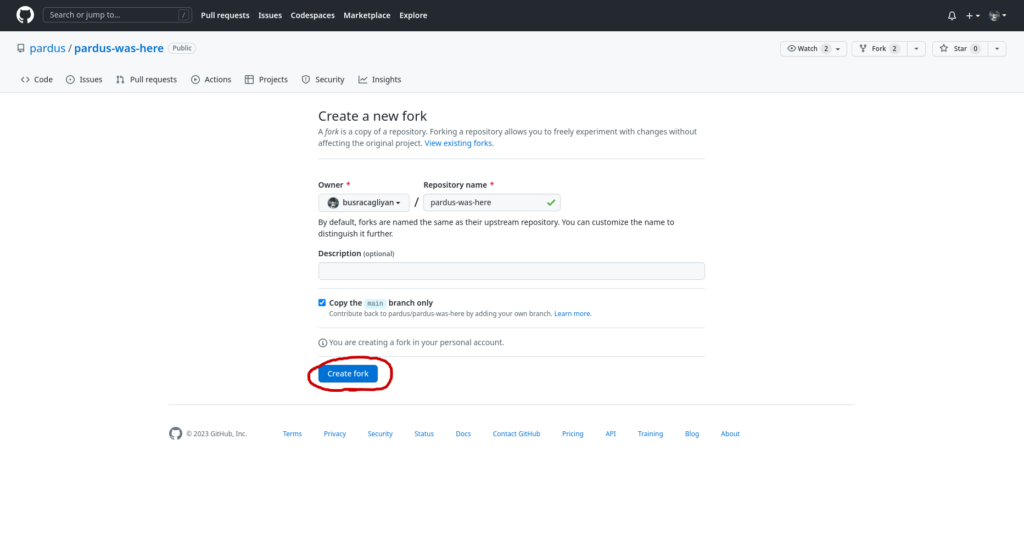
- İlk olarak seçtiğimiz projeyi kendi hesabımıza kopyasını (fork) alıyoruz. Bunun için projeyi görüntülediğimiz sayfada, “Fork” butonuna tıklıyoruz.
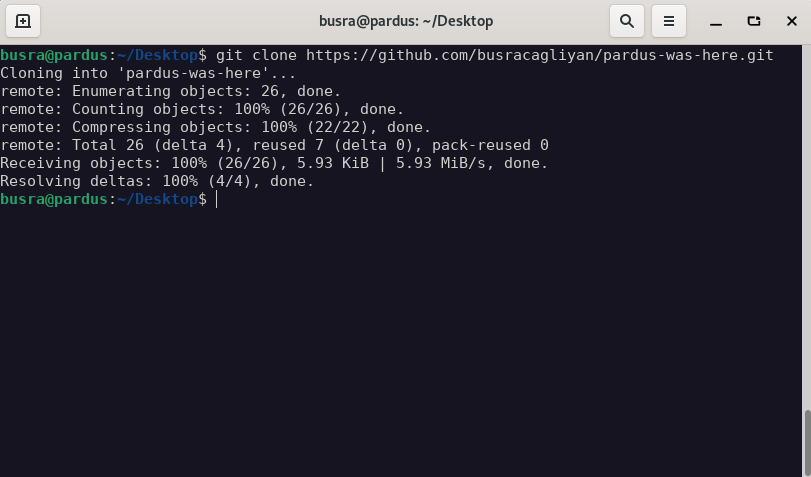
- Sonra kopyaladığımız projeyi bilgisayarımıza “git clone” komutunu kullanarak klonluyoruz. Bu bölümde klonlama işlemini HTTPS kullanılarak yaptık.
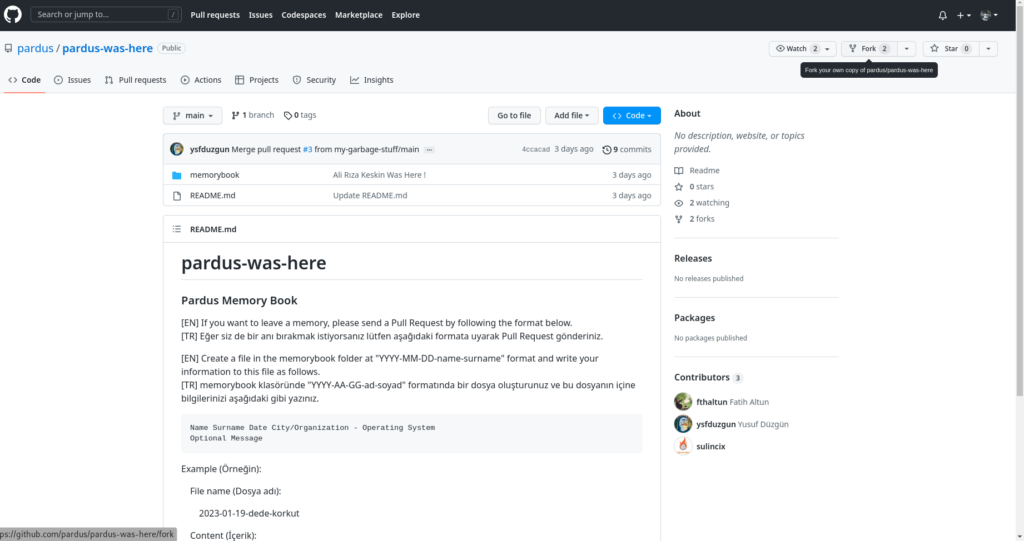
- Projelerde çoğunlukla yer alan README.md dosyaları bir projeye katkı vermek istediğinizde oldukça önem taşır. “Nelere dikkat etmelisiniz? Geliştirdiğiniz ve projeye eklenmesini istediğiniz kodlar ve dokümanlar için kod yazım standartları nelerdir? Yazdığınız kodun açıklamalarını ne şekilde yazmalısınız?” gibi konularda belirlenmiş olan standartlar bu dosyada yer alır. pardus-was-here projesinin README.md dosyasını incelediğimizde bizi memorybook klasörünün içinde “YYYY-AA-GG-ad-soyad” formatında bir dosya oluşturmamız gerektiği yönünde yönlendiriyor ve dosyanın içeriğinin nasıl olması gerektiğini de detaylı şekilde gösteriyor.
- Şimdi belirtildiği gibi klonladığımız dizine girip ve memorybook klasörünün içinde “YYYY-AA-GG-ad-soyad” formatında bir dosya oluşturuyoruz. Bunu komut satırından nano kullanarak aşağıdaki gibi yapabiliriz.
nano YYY-AA-GG-ad-soyad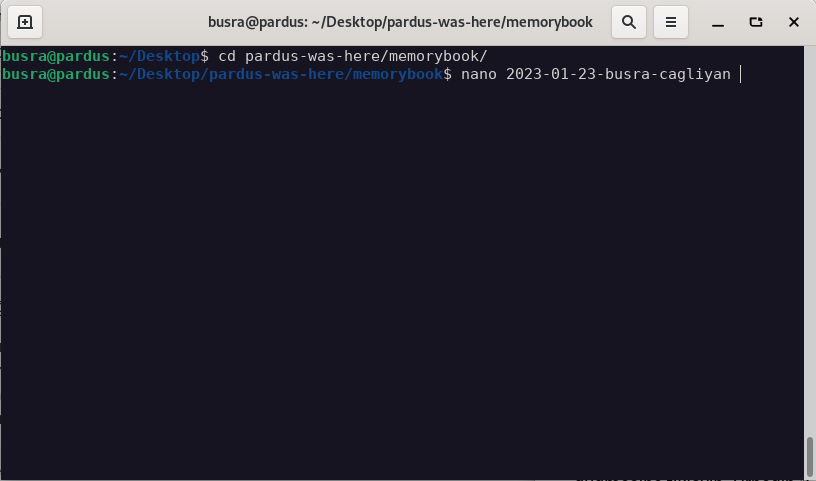
- Oluşturduğumuz dosyanın içine bilgilerimizi README.md dosyasında bize belirtildiği gibi aşağıdaki düzene göre yazıyoruz.
Name Surname Date City/Organization - Operating System
Optional Message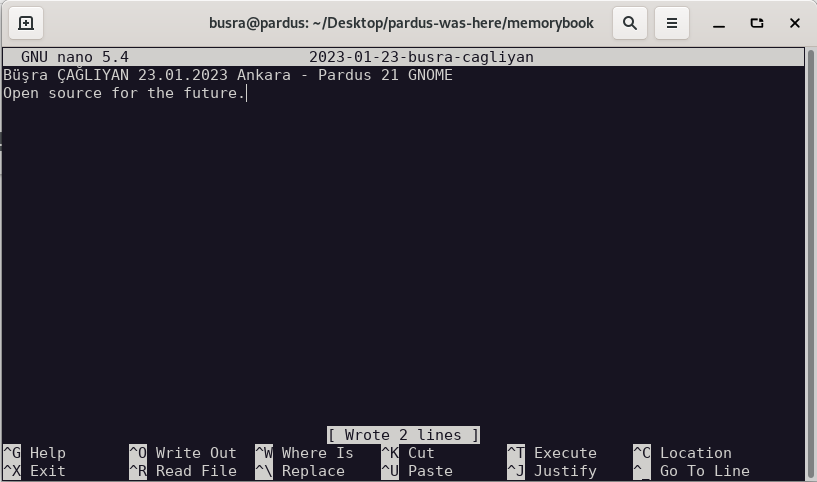
- “git add” ve “git commit” komutlarını kullanarak değişiklikleri kaydediyoruz. Commit mesajı “Name Surname was here” formatında olmalıdır.
git add .
git commit -m <commit mesajınız>
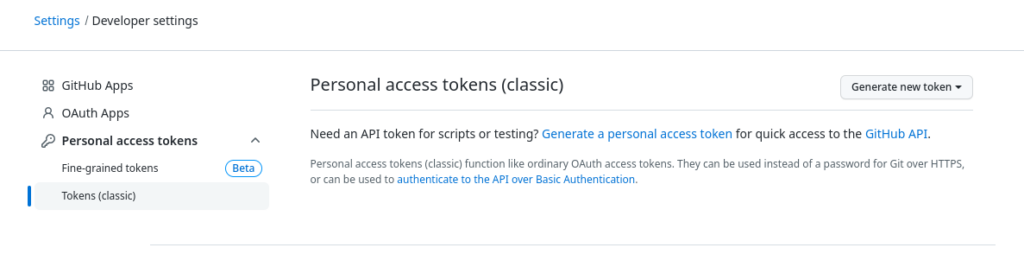
- “git push” komutunu kullanmadan önce kimlik doğulama için token almalıyız. Bunun için Settings bölümünden Developer settings‘e tıklıyoruz. Personal access tokens‘ın altındaki Tokens (classic)‘i seçiyoruz.
- Generate new token (classic) ‘i seçip token’ımızı oluşturuyoruz. Sonra “git push” komutunu kullanıp şifre yerine oluşturduğumuz token’ı yazıyoruz. Son aşama olarak da GitHub web arayüzünde kendi hesabımızdaki pardus-was-here projesine gidiyoruz. “Pull Request” butonuna tıklıyoruz. Daha sonra çıkan sayfada create pull request’e tıklayıp pull requestimizi oluşturuyoruz. Yaptığımız pull request’imizi takip ederek geri bildirim alabilir ve hata düzeltmeleri yapabiliriz.
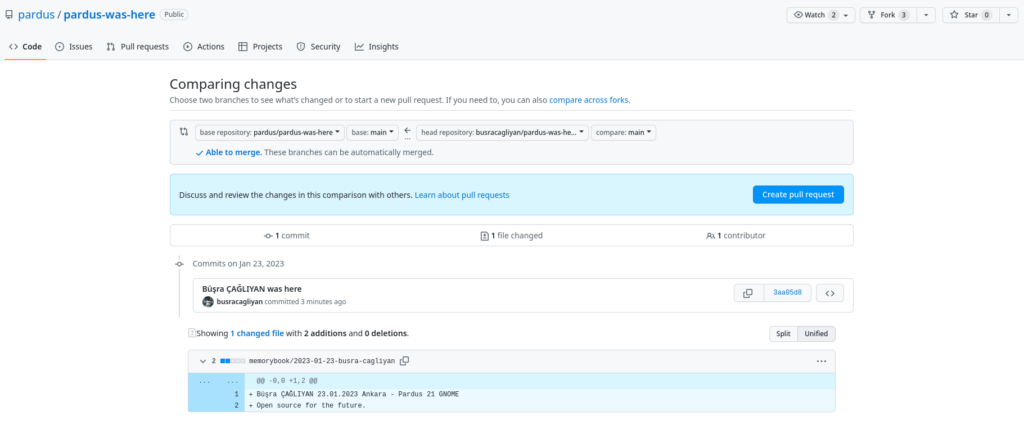
Eğer yukarıdaki aşamaları doğru bir şekilde yaptıysanız, Pardus GitHub hesabı moderatörleri sizin Pull Request talebinizi yukarıda görülen ekranda görüntüleyebilir. Eğer yukarıdaki adımlara uygun olarak ilerlediyseniz, kısa zaman içerisinde Pull Request’iniz kabul edilir ve yaptığınız değişiklikler projeye dahil edilir. Proje sayfasında bu değişikleri görüntüleyebilirsiniz.
Tüm bu süreçlerden sonra, artık siz de bir gönüllü Pardus geliştiricisisiniz, aramıza hoş geldiniz.