

Nvidia tarafından piyasaya sürülen ekran kartları günümüzde birçok kullanıcı tarafından oyun yazılımlarını çalıştırmak için kullanılsa da bu ekran kartlarının birçok alanda kullanıldığını bilmeliyiz. Ekran kartları özellikle yapay zeka teknolojilerinde iş yükünü hızlı bir şekilde tamamlamak amacıyla kullanılmaktadır. Özellikle Nvidia tarafından tasarlanan Tesla ekran kartları bu alanda popüler olarak kullanılmaktadır. İsteyen kullanıcılar ise kendi bilgisayarlarında bulunan herhangi bir Nvidia ekran kartı ile birlikte yapay zeka çalışmalarını hızlı bir şekilde yapabilmektedir.
Yapay zeka çalışmalarının bir CPU üzerinde gerçekleştirilmesinde bazı sorunlar oluşmaktadır. Bu sorunlardan en önemlisi ise işlem başına alabileceği veri kapasitesinin sınırlı olması ve bu nedenle yapılmakta olan işlemin süresinin çok uzun bir zaman dilimine yayılmasıdır. Ekran kartı üzerinde yer alan GPU’nun daha güçlü veri işleme kapasitesi ve bu veriyi anlık olarak sistem RAM belleği yerine ekran kartı üzerinde yer alan RAM bellek üzerinde gerçekleştirmesi yapay zeka çalışmalarını hızlandırmaktadır. Bu durumu özetlemek gerekir ise CPU üzerinde herhangi bir yapay zeka çalışması gerçekleştirmek istediğinizde belki günlerce bekleme ihtimaliniz varken eğer bir GPU üzerinde bu işlemleri yaparsanız sadece birkaç saat beklemek zorunda kalırsınız.
Özellikle yapay zeka destekli bilgisayarlı görü, görüntü işleme, nesne takibi, yüz tanıma, doğal dil işleme, insansız araç teknolojileri için vazgeçilmez olan Nvidia ekran kartlarını daha aktif olarak kullanmak ve Pardus kullanıcılarının yapay zeka çalışmalarına katkıda bulunmak için CUDA ve cuDNN kurulumlarını anlatacağım.
Öncelikle CUDA ve cuDNN için kısaca bilgi edinmemiz gerekmektedir. CUDA (Compute Unified Device Architecture), C dili üzerinde yazılmıştır. GPU’ya ait olan hafıza ve işlemci birimlerini yönetme imkanı vermektedir. cuDNN, GPU üzerinde deep learning işlemlerinde kullanılan Python kütüphanelerini (TensorFlow, PyTorch vb.) hızlandırmak için oluşturulmuş bir yazılımdır. Aktif olarak bu iki yazılım ile birlikte Pardus üzerinde yapacağımız yapay zeka çalışmalarını hızlandırmış olacağız.
Önemli
Bazı kurulum hatalarını önlemek için sisteminizde yer alan Nvidia ile ilgili sürücüleri aşağıdaki komutlar ile kaldırabilirsiniz.
sudo apt-get purge nvidia*
sudo apt-get autoremove nvidia*
CUDA Kurulumu
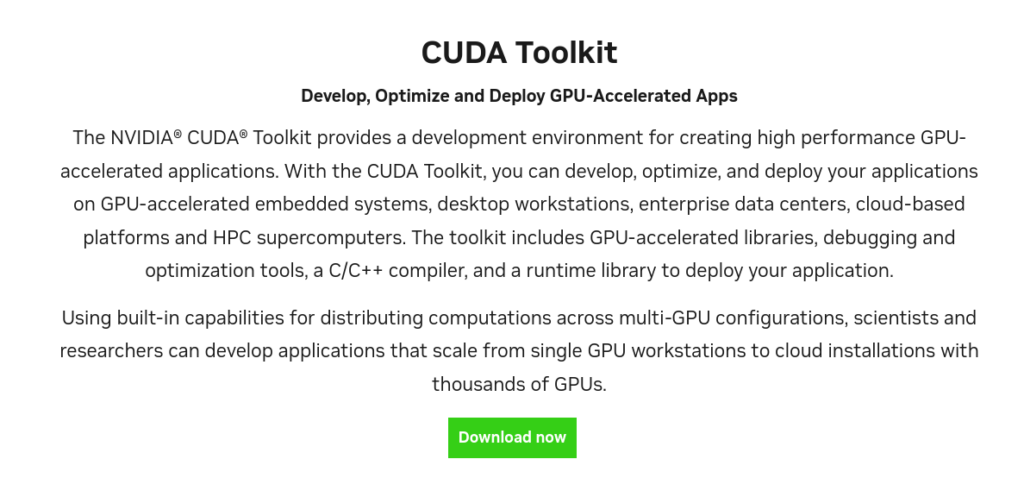
İlk önce linkte belirtilen adrese gidiniz. https://developer.nvidia.com/cuda-toolkit
Bu sayfada yer alan Download Now butonuna tıklayınız.
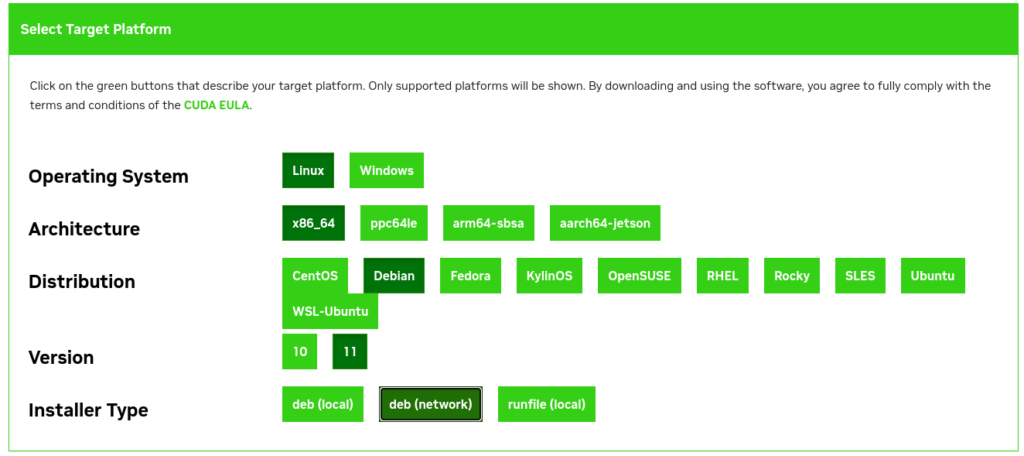
Bir sonraki adımda ise aşağıdaki seçenekleri sırası ile seçiniz. Burada işletim sistemi türünü, işlemci mimarisini, işletim sistemi dağıtımını ve sürümünü seçmiş olduk. Pardus, Debian işletim sistemi esas alınarak geliştirildiği için ilerleyen adımları Debian’a uygun olarak gerçekleştireceğiz. Bu adımda local, network ve runfile isimli kurulum seçeneklerini seçebilirsiniz. Bundan sonraki adımlar sunucu üzerinden kurulum yapılacak şekilde devam edilecektir.
Karşımıza aşağıdaki gibi bir ekran gelecektir, burada yer alan adımları gerçekleştirdiğimizde CUDA kurulumu başarılı bir şekilde yapılacaktır.
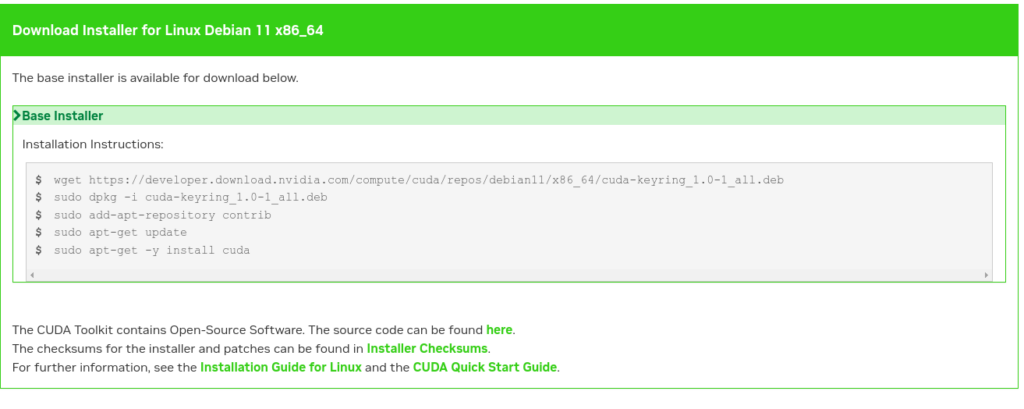
wget https://developer.download.nvidia.com/compute/cuda/repos/debian11/x86_64/cuda-keyring_1.0-1_all.deb
sudo dpkg -i cuda-keyring_1.0-1_all.deb
sudo add-apt-repository contrib
sudo apt-get update
sudo apt-get -y install cuda
Bazı durumlarda ise üçüncü satırdaki komut için hata meydana gelebilmektedir. Bunun için aşağıdaki işlemleri gerçekleştiriniz.
“sudo add-apt-repository contrib” Hatası Çözümü
sudo apt-get install software-properties-common
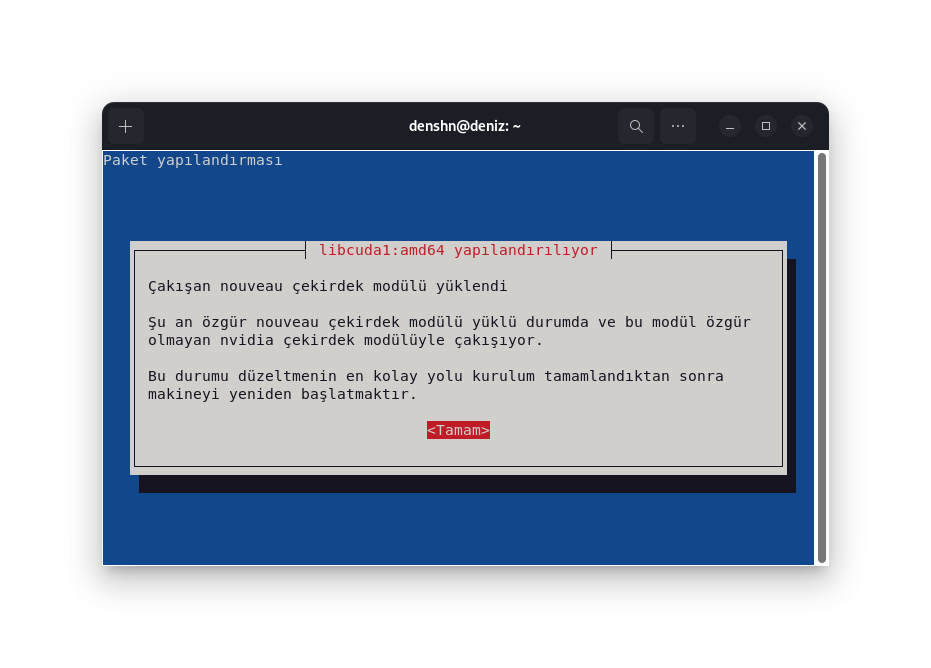
Bazı durumlarda kurulum sırasında aşağıdaki adımları el ile yapmanız gerekmektedir. CUDA kurulumunda sizden çakışan bir paket ile ilgili işlem yapılması için izin istenmektedir. Bu işlemi onaylayınız.
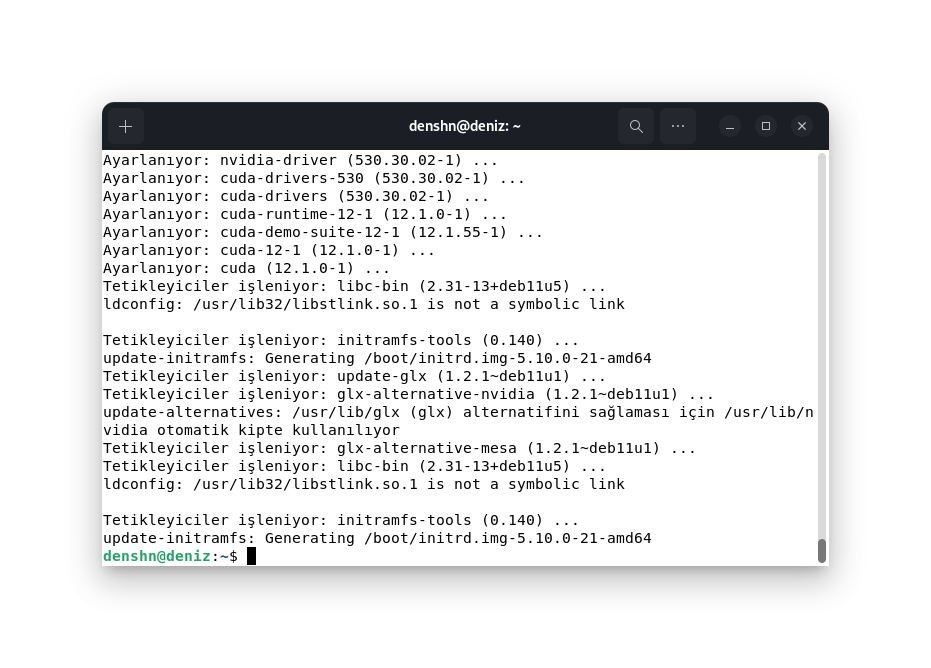
Bu adımlardan sonra terminal ekranınızda aşağıdaki ekran gelecektir ve bu adımdan sonra sisteminizi yeniden başlatmanız gerekmektedir.
Sisteminiz yeniden başlatıldıktan sonra, aşağıdaki kodu terminal ekranınıza yazınız ve ekran kartınız için CUDA kurulumunu doğrulayınız.
nvidia-smi
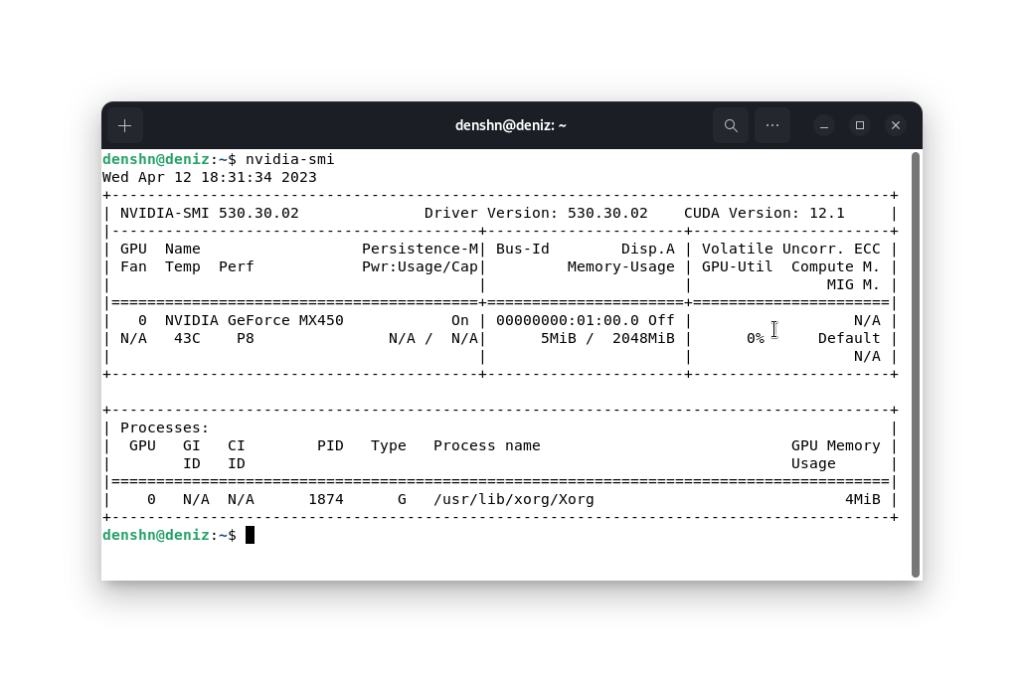
Başarılı bir şekilde CUDA kurulumunu gerçekleştirmiş bulunmaktayız. Özellikle cuDNN kurulumu için CUDA sürümüne dikkat ediniz. CUDA 12.1 için cuDNN kurulumu gerçekleştireceğiz.
cuDNN Kurulumu
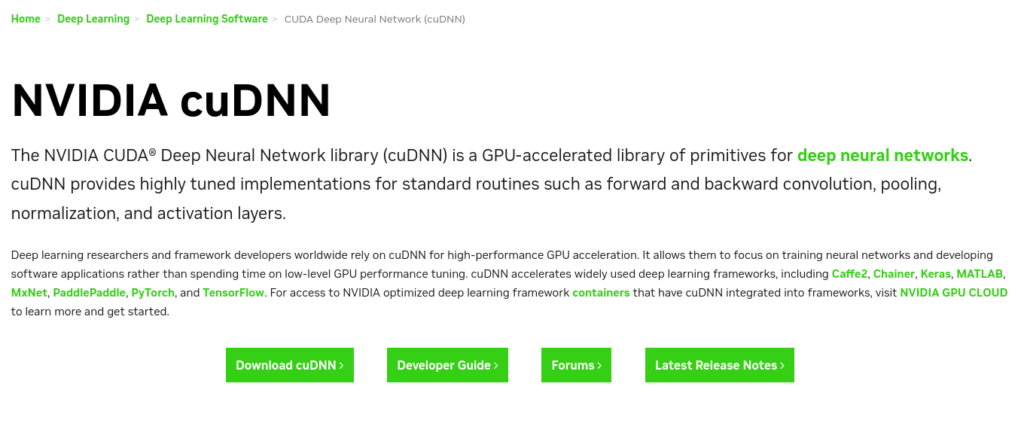
CUDA kurulumunu başarılı bir şekilde gerçekleştirdikten sonra belirtilen linke belirtilen adresi açınız. Bu adreste aşağıdaki gibi bir ekran karşınıza gelecektir. Bu ekranda yer alan Download cuDNN butonuna tıklayınız.
Bu adımdan sonra bir Nvidia Developer hesabınız olması gerekmektedir. Bunun için bir hesap açmalı ya da mevcut geliştirici hesabınızı kullanmalısınız.
Gerekli oturum açma işlemlerinden sonra karşımıza aşağıdaki sayfa gelecektir ve Nvidia tarafından belirtilen kullanım koşullarını kabul ediniz. Daha sonra ise yukarıda çalışıtırsığımız nvidia-smi komudu ile elde ettiğimiz CUDA sürümüne uygun olarak ilgili sürümü seçiyoruz.
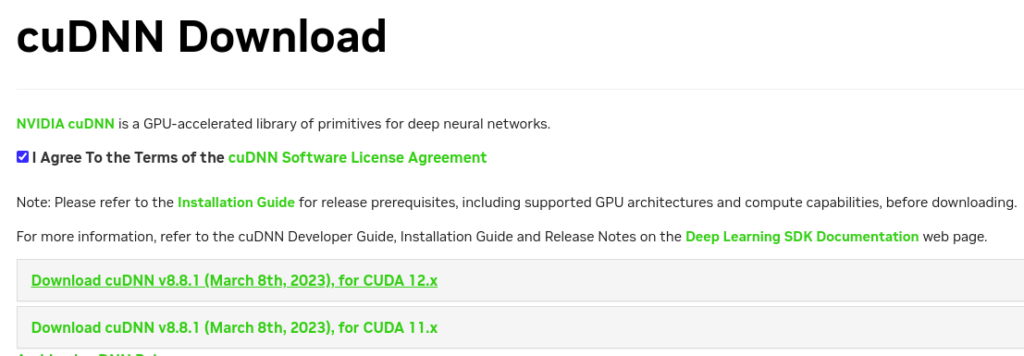
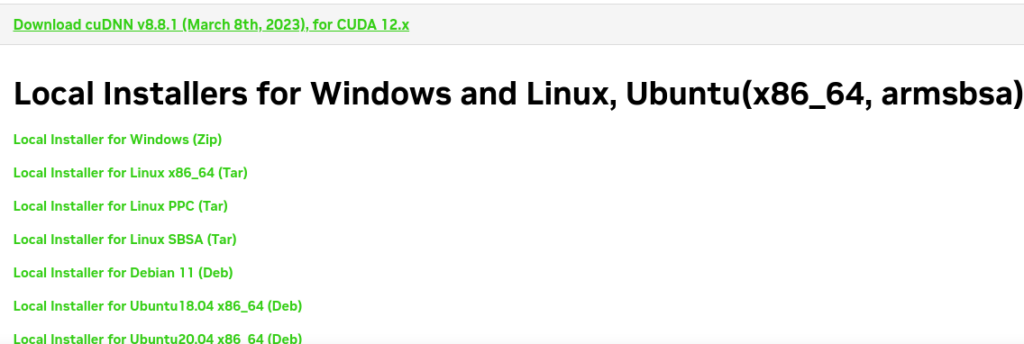
Daha önce belirtilen CUDA sürümü 12.1 olduğu için Download cuDNN v8.8.1 (March 8th, 2023), for CUDA 12.x bölümü altında yer alan Local Installer for Debian 11 (Deb) paketini indiriniz. Bu paketi aşağıdaki komut ile kurunuz.
sudo dpkg -i cudnn-local-repo-debian11-8.8.1.3_1.0-1_amd64.deb
Daha sonra aşağıdaki komutu çalıştırınız.
sudo cp /var/cudnn-local-repo-debian11-8.8.1.3/cudnn-local-313BFFCD-keyring.gpg /usr/share/keyrings/
Depoları güncelleyiniz.
sudo apt-get update
Daha sonra runtime kütüphanesi ve developer kütüphanesi için aşağıdaki komutları sırası ile çalıştırınız.
sudo apt-get install libcudnn8=8.9.0.131-1+cuda12.1
sudo apt-get install libcudnn8-dev=8.9.0.131-1+cuda12.1
Bu adımlardan sonra başarılı bir şekilde cuDNN kurulumunu gerçekleştirmiş bulunmaktayız.
Uyarı
CUDA ve cuDNN kurulumu için sahip olduğunuz ekran kartına ve kullanmak istediğiniz yapay zeka kütüphanesine dikkat etmeniz gerekmektedir. Örnek olarak PyTorch ve TensorFlow resmi kaynaklarında yer alan ve desteklenen CUDA ve cuDNN sürümleri farklılık gösterebilmektedir. Geliştirmek istediğiniz yapay zeka projelerinize uygun olan sürümleri seçiniz.
Kaynaklar
https://tr.wikipedia.org/wiki/CUDA
https://developer.nvidia.com/cuda-toolkit
https://developer.nvidia.com/cudnn
https://docs.nvidia.com/deeplearning/cudnn/install-guide/index.html